A couple of years ago, I walked into a menswear store in Houston to order some custom-made shirts and pants.
The owner, who has worked in the fashion business for three decades, suggested that I get a few ties to complement my outfits. I agreed and started browsing through the collection of straight ties.
The owner had something else in mind. Out of the corner of my eye, I could see that he was gathering an assortment of bow ties.
“These would look great on you,” he said as he laid the ties in front of me.
“I like these…” I said with hesitation. “…but I don’t know how to tie a bow tie.” I tried to avert my eyes, but the owner’s hearty laughter drew me back into the conversation.
“Don’t worry,” he said. “It’s as easy as tying your shoes. I’ll teach you.”
He spent the next few minutes showing me how to tie a bow tie and I spent the next hour attempting and failing.
I was frustrated and upset with myself. The owner made it look so easy, but my feeble mind wasn’t comprehending.
I finally gave up and asked if he had any pre-tied bow ties.
“Don’t get upset,” the owner said. “It took me a while to learn how to tie a bow tie. Keep practicing and it’ll become second nature.”
After two years of practice, it has finally become second nature.
If you want to become a bow tie master in no time, don’t follow my example. Follow these simple steps instead.
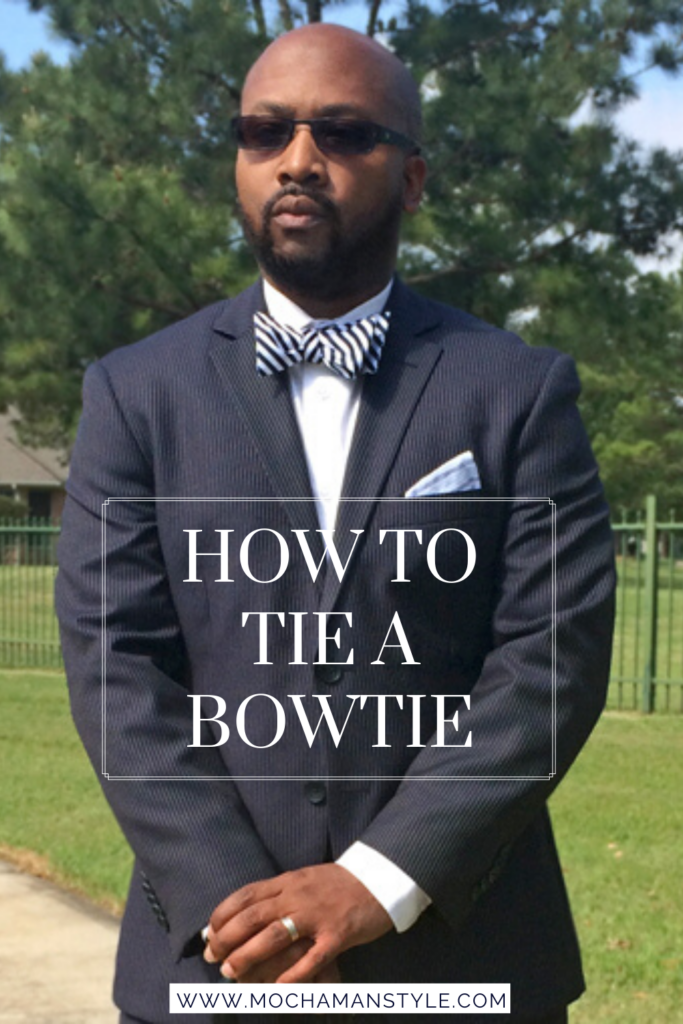
How To Tie a Bowtie
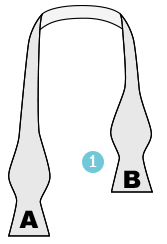
Step 1
Place the bow tie around your neck. Adjust the tie so the right side is shorter than the left side. The end on the left will be referred to as A and the end on the right will be referred to as B.
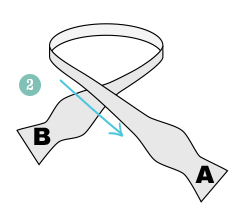
Step 2
Move A to the right side, across B.
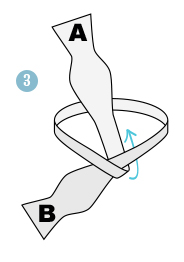
Step 3
Bring A under B and up through the neck loop. Pull the tie to your desired tightness.
Step 4
At the joint, fold B towards the right and then towards the left to create a bow shape.

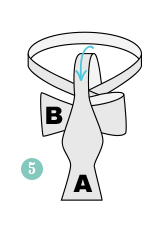
Step 5
Bring A straight down over the middle of the bow shape that was made with B.
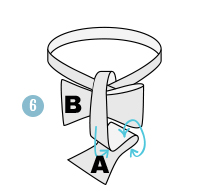
Step 6
Fold A back towards the chest and pinch the fold.
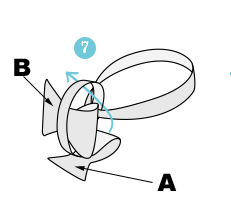
Step 7
This is the trickiest part and the key to your success. Push the pinched end (A) through the loop behind B. You may have to practice this step a few times until you get it right.
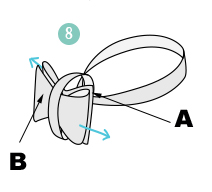
Step 8
Pull on the folded parts of the bow to tighten.
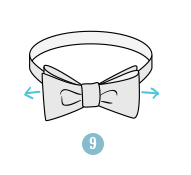
Step 9
Adjust until balanced on both sides. Don’t worry if both parts aren’t perfectly aligned.
Step 10
Celebrate! You’ve successfully tied a bow tie.
If you’re still having trouble, watch this video from Ties.com. It helped me to learn fast:
P.S. – One of my Twitter followers suggested practicing by tying the bowtie around your leg.
Tweet us @mochamanstyle or leave a comment on our Facebook Page to share your thoughts on this article. Follow us on Instagram @mochamanstyle

Frederick J. Goodall is the Editor-in-Chief of Mocha Man Style, media spokesperson, event host, photographer, and a top social media influencer in Houston, TX. He likes to write about fashion, cars, travel, and health.


Thanks, this was helpful. I actually learned from Mr. Charles French via this video – http://youtu.be/AEjF-MzzqaE
Cheers,
Pop
I’m glad I could help. Thanks for sharing the video with me. I’ll let my readers know about it.